Defining computer and workgroup name and verifying the
Ethernet adapter
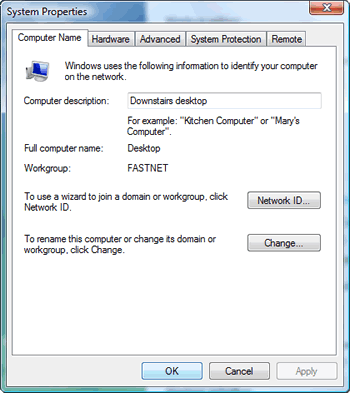
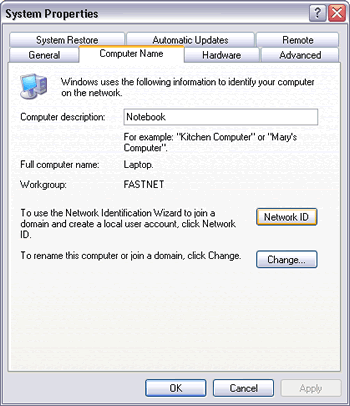
1. Define computer and workgroup name for each computer.
In Windows XP and Windows Vista, you can do it on
Computer Name tab of System Properties window. To open System
Properties, right-click Computer in Start menu (Windows Vista) or
My Computer (Windows XP) and select Properties or
open Control Panel and click System. Each computer name must be unique while the workgroup name must be
the same with other computers in a LAN. If both computers run Windows Vista, having the
same workgroup name is not mandatory but it will make the direct
connection work
faster. The default workgroup name is MSHOME in Windows XP Home
Edition and WORKGROUP in Windows XP Professional and Windows Vista. You can leave it
or change it, provided both computers have the same workgroup name. If you make a change, you'll have to restart your
computer.


Picture:
Defining computer name and workgroup name
from System Properties' Computer Name tab.
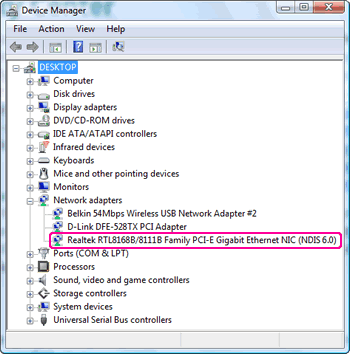
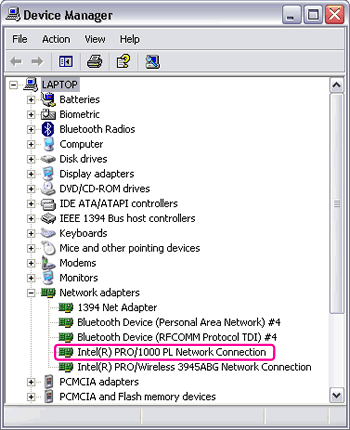
2. From the Device Manager, verify that the Ethernet adapters
which are going to be used for the direct connection have been
installed and enabled on both computers. In this demo, both
adapters are Gigabit Ethernet. However, you can connect a
Fast
Ethernet (10/100BaseT) adapter on one computer to a Gigabit
Ethernet (10/100/1000BaseT) adapter on another computer but this
configuration can't reach the maximum speed of Gigabit Ethernet,
i.e. 1 Gbps (1000 Mbps).


Picture:
Viewing the installed (Gigabit) Ethernet card/NIC from the Device Manager.
|